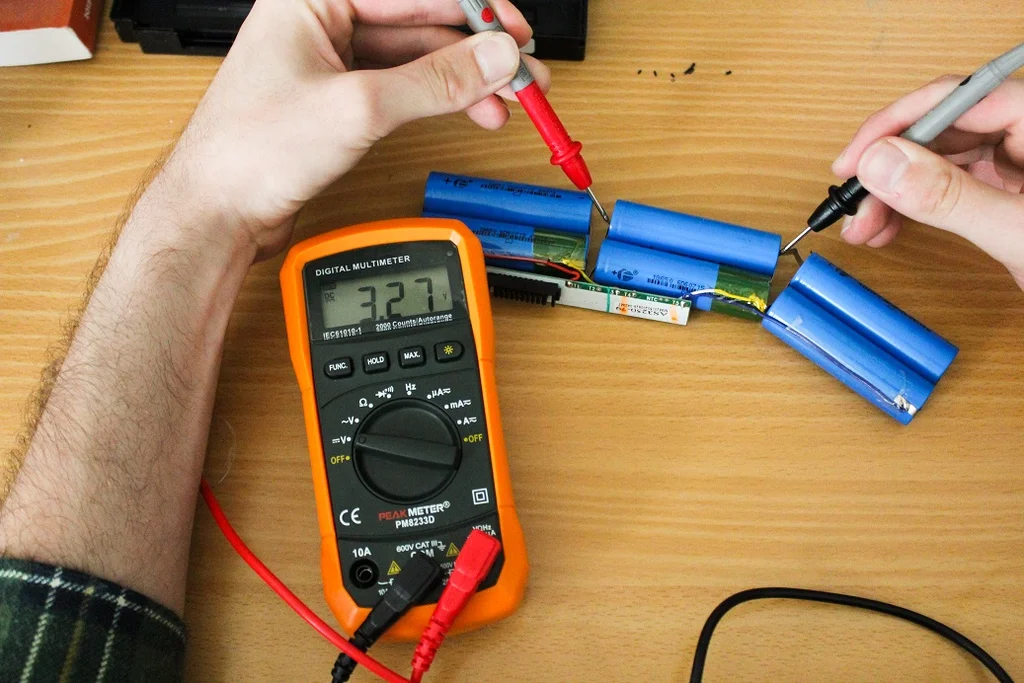

When it comes to fixing laptop batteries, understanding their structure and common issues is crucial. Many users experience problems such as sudden shutdowns or the inability to charge, which can significantly impact their productivity. In this guide, I’ll walk you through the steps to troubleshoot and repair your laptop battery, making it easier for you to enjoy uninterrupted usage.
Disclaimer
Before diving into the repair process, please note that improper handling can lead to battery damage or safety hazards. Ensure that you understand each step thoroughly and are prepared for potential risks involved.
Step 1: Understand Battery Structure
To effectively fix your laptop battery, it’s essential to grasp its basic structure. Most laptop batteries consist of several battery cells, typically arranged in series and parallel configurations. Each cell operates at approximately 3.7V, while the total voltage can reach about 11.1V when multiple cells are connected. If one group of cells has an abnormal voltage, it may prevent the charger from functioning correctly. This insight can save you time and effort during your repair process.
Step 2: Gather Necessary Tools
To proceed with your battery repair, you’ll need some straightforward tools that are usually available at home:
- Multimeter
- Charger (preferably 4-5V)
- Utility Knife (for removing the outer casing)
- Screwdriver
Having these tools ready will set you up for success.
Step 3: Remove the Battery
Start by ensuring that your laptop is completely powered off and unplugged. Next, flip the device over to locate the battery. Carefully press the latch to release and remove the battery. Although this may seem like a simple task, take your time to avoid damaging any components.
Step 4: Open the Battery Casing
Use the utility knife to gently pry open the battery’s plastic casing. During this process, be cautious not to injure yourself or harm the internal circuits. I remember struggling with a tightly sealed battery; patience is key here.
Step 5: Check Battery Voltage
This is a critical step. Use the multimeter to measure the voltage of each cell. The ideal reading should be around 3.7V. If you find any cell with a significantly lower voltage, it indicates that it requires charging. It’s surprising how many battery issues stem from imbalanced voltage levels.
Step 6: Charge the Battery
Charging is a straightforward yet vital process. First, identify the positive and negative terminals of your charger using the multimeter. Connect the charger’s positive terminal to the battery’s positive terminal and the negative terminal to the negative terminal. Charge it for about one minute; this brief period can help revive the battery’s cells.
Step 7: Reassemble the Battery
Once charging is complete, check to see if the voltage has returned to the expected level of 3.7V. If all cells appear normal, carefully place the battery back into its casing, securing it with tape to ensure stability. I’ve learned from experience that proper reassembly is crucial; a loose connection can lead to further issues.
Step 8: Reinstall the Battery in the Laptop
Now, gently place the repaired battery back into your laptop, ensuring it locks into position. You’ve done a significant amount of work, so take a moment to appreciate your effort.
Step 9: Charge and Test
Connect the charger to the laptop and allow the battery to charge for about one minute. After this, disconnect the charger and try powering on the laptop. If it boots up successfully, congratulations! You’ve successfully fixed your battery. It’s an incredibly satisfying feeling to resolve such issues on your own.
Additional Tip: Consider Battery Replacement
If, after all these steps, the battery still does not function correctly, it might be time to consider a replacement. While fixing it can save you some money, sometimes investing in a new battery ensures safety and reliability. I recall a friend who attempted to repair their old battery, only to find that the effort and time spent exceeded the cost of a new one.
Conclusion
Repairing your laptop battery is undoubtedly a challenging yet rewarding task. By following the steps outlined above, you can restore the battery’s functionality without incurring significant costs. Remember, safety is paramount—if you’re unsure about any aspect, seeking professional help is a wise decision. Finally, I’d love to hear from you: have you experienced a moment of triumph while fixing a device? Are you eager to take on more DIY projects in the future?


